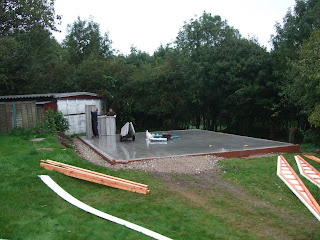
The last blog left the concrete base awaiting the building. Well, a week later the building arrived on a truck about the size of a large flatbed but not quite long enough to be articulated. It had its own forklift truck which was of limited use. The first piccy shows the truck and all the panels neatly stacked.
The guys had arrived at their factory at 4.30 am to load up the kit and arrived at 7.00 am at our cottage. It had also rained so the base was slightly wet but they ploughed on. The idea is to erect the whole building and finish it in a day!
The next stage was somewhat humorous, for me at least. When the build started, I of course was watching out of interest and possibly interference. Having marked out the base to exact measurements I gave them, they began the assembly, only for me to come running over and say it was being done wrong in that the window positions were incorrect.
This really made the guys happy as they brandished the drawing in front of me only for me to point out it was the wrong revision!, a revision two months older than the current one. Now that the drawing was sorted all was calm, especially when hot tea arrived to warm the guys up. The next piccies show stages of the build to the point of disappointment occurred!!!!!
We had now got to the point where all four walls were done, windows were in, fascias front and back were up and the roof was to go on. Only the roof didn't go on!!!!!!!!! The main concrete fibre sheets were 6" too short.The only silver lining was that the delay would only be two days and at the same time the guys building the room had suggested an extra steel roof support as they were unhappy with the number provided.
We were gutted! The project had to wait two days and that was unfortunate. On the Wednesday, the same crew arrived with the correct panels and it was raining rather a lot. It looked like the construction of a swimming pool to some extent. To add to the fun, the extra support was too short in height. The air was blue for a while whilst they talked to the factory and then they progressed. The roof went on and then more little dramettes. The low pitch of the roof meant that the design had left the side wall too shallow and to fit the roof panels was stressing/bending them. So, more mods would be needed which were straightforward and this turned out to be a blessing in disguise. When the roof went on and the door was opened, the wall at the front flexed!!!, rather alarmingly!!! When you stood back and looked it was easy to see why, a 24'6" wall, effectively unsecured, with a PVC door in the middle.
The roof panel problem meant a third visit the next day but at least the wet weather was being kept out. The Thursday saw a different crew arrive, the foreman no less. Everything this day went smoothly, all remaining jobs were completed, mods to my design to brace the wall incorporated and the roof secured down. All the work was done in four hours.
The last piccy shows the nearly finished building
The guttering was added after this piccy was taken. Since this, I've been inside and used Urethane foam to seal all the windows, doors, and ridge timbers that are on the support walls. I did this because the foam is good at penetrating all the little gaps and it means that no silicone gets used which I want to avoid as it perishes too easily and can blacken.
Not long after this, at the weekend, we had the severe weather test where it failed in two areas. The first was expected, water drove in at the panel joins, just above the internal cement fillet and forced its way past the mastic that was supposed to prevent this. However, the planned rendering should permanently cure this as this was an expected issue. The second area was the roof ridge line covering. It is not the best engineered way to do it but I was constrained by keeping to planning restrictions on overall height. The problem is that the ridge line is not a tile but a steel panel covering. It is "sealed" with eaves fillers and the driving rain made short work of this in one area only. The fixes had already been identified. The area will be sealed with the magic urethane foam and then coated with silicone based resin. On top of this I plan a piece of lead flashing, bonded to the ridge line, to cover the whole ridge. That will hopefully cure that.
I'm now cleaning out the excess foam from all the cracks. I can't do anything with the floor until November as it has to dry and its amazing how much moisture is present that is evidenced by condensation on the bottom of the concrete roof panels.
Next update will be when the rendering is done. Figure wise, over 4,000 are with the painter. Storage trays are being made now to accommodate them and I hope to order the WW2 figures by the end of this month.
Its all beginning to feel real now!


