It seems a long time since I last updated the blog with a battle. Things have still been frenetic at the Situation Room, even if the output has seemed lacking. The success of the Borodino game has "secured" the "juggernaut of a project" continuing with the same pace. The game for 2018 is planned to be Dresden in 1813. It has the importance of Austerlitz, in that had the other battles, the same day, gone Napoleon's way, then the 1813 campaign would have finished as a French victory.
So, the idea was to start play testing elements of the battle of Dresden. As it turns out, I already have all the key terrain features, the city walls, the lunettes and the Gross Garten, christened the "death star" in a previous incarnation!
The reader will have to do some "map looking up" before reading the short account. I decided to do the initial contacts in the area of Freiderichstadt, which is on the allied left flank as they approach Dresden from the south. The allied right of the battlefield was constrained by the Weisseritz stream and the left flank by the River Elbe.
As this was an encounter, with the allies having no real idea of what they were facing, it was a good time to test out how approaches might be done and see the difference between aggressive advance and careful methodical advance.
The French started with 3 second class line Btns on the battlefield and a Division of good light cavalry lead by Elite Vistula Legion Uhlans. French numbers would rise to 2 Infantry Divisions and 2 Light Cavalry Divisons, including the start numbers. The allies, all Austrian, would have double these numbers.

This is the Austrian advance on their left, Grenzers probing out in front. The French had no troops at all in this area, although a blank tile was deployed at the beginning of the game to invoke some fog of war and uncertainty as to which tiles had troops and which did not, the allied having no idea if they were all blanks or all had troops.

On the Allied right, a line infantry Division is advancing on a set of 3 villages, more or less et one behind the other. the centre of the battlefield has a wood, but there is a large open space after passing these features and the Dresden suburb of Friederichstadt. The French cavalry immediately move to engage the formed Austrian Btns. The real objective is for the a French to gain time to allow their reinforcements to arrive ands attempt to occupy the villages and form a solid defence in depth.

The Austrian columns have swept away the initial French defending Btn and continue to advance. It can already be seen that the Austrian cavalry is having problems in deploying in strength as space has already become an issue.

This pic is looking at the French forces, which are spread very thin! However, they are making best use of the space and this is helping mitigate to some extent against enemy numbers.

The Austrian advance, from the right in the pic, has cleared 2 of the 3 villages to their front. They continue to advance at pace, but the third and last village becomes a somewhat prickly thorn.

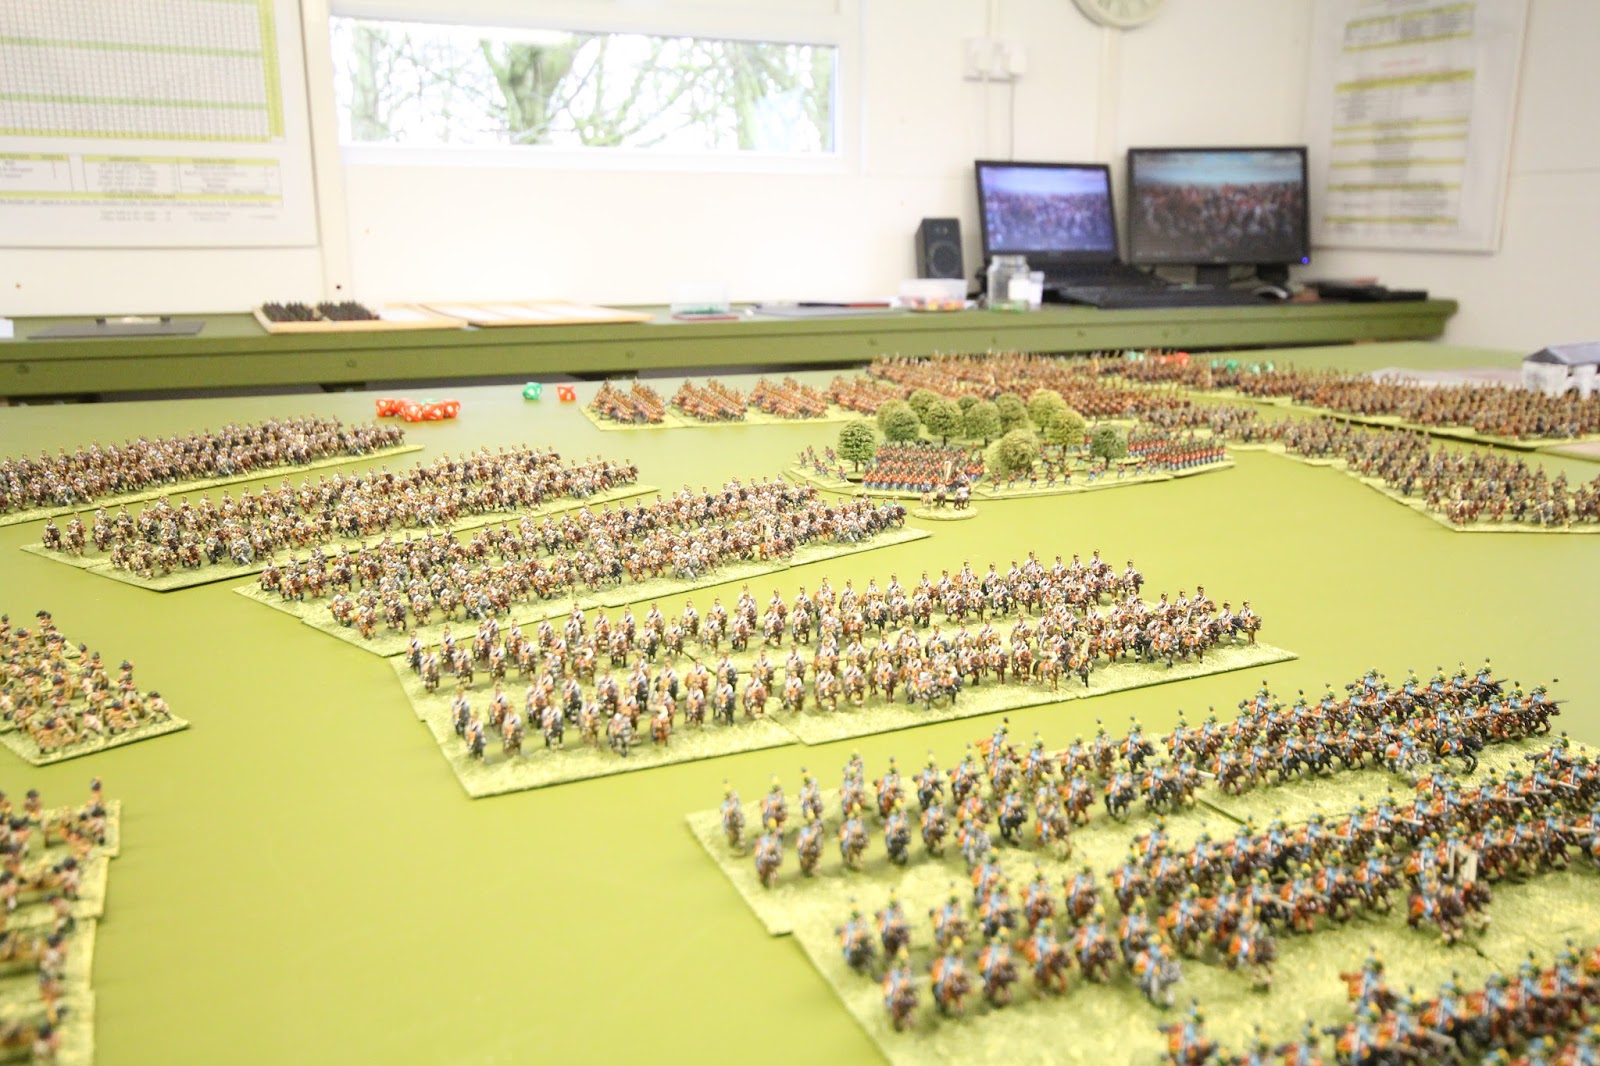
This shot is from the left rear of the third village which is the left flank of the French and the village on the left in the previous pic. It shows the whole battlefield. Nearly wall to wall Austrians advancing between the river and stream, infantry heavy on their right (foreground) and cavalry heavy on their left (background). French reserve infantry arrive in the nick of time to the rear of the third village and stabilise the entire French left flank.
A closer shot of the Austrian left flank. The cavalry have sorted themselves out and are now preparing to attack in successive formations.

The reserve French cavalry has also arrived and the initial French cavalry has had time to rest before the Austrian onslaught begins.

The cavalry of both sides clash. The winner would also win the day, as it would be clear that the other side would need to withdraw to ensure not being outflanked by a mass of cavalry.
Its a draw! Both sides manage to hold after committing their entire cavalry formations. We then called the battle, with honours even. The interesting part of the battle was to see how players cope with advancing into the unknown with large forces. The defender has it somewhat easier in that all initial moves are in reaction to the enemy. But cute tactics can gain time, the factor that the defender needs.

The seated men, myself & Graham, were French. Pete & Steve were the allies.
The next instalment will be another play test, this time Dresden fought on a grander scale from the Weisseritz to the Landgrabben, situated on the far side of the GrossGarten (deaths star). You'll see why next time.
As a final plug, the latest Companion book has been published and is available from Caliver. It is called,
Fighting the Russians, Before Russia 1805-1805.
It consists of the battles of Austerlitz, split into the northern & southern sectors, Eylau & Frieldand. I hope you buy it, it is worth the read and is full of maps, OBs and of course many pics from the actual games.