Tuesday, 5 April 2016

Game 39, Supagame 1 : Kharkov

This game was the madness that was played out in a hotel in January. We had 20 players and about 600 square feet of table. We were in the hotel for a whole week. It was a two part game, reinforcements and repositioning occurring during the week. The games in the hotel, this being the first one, are being called  "Supagames" and it is hoped it becomes an annual event.
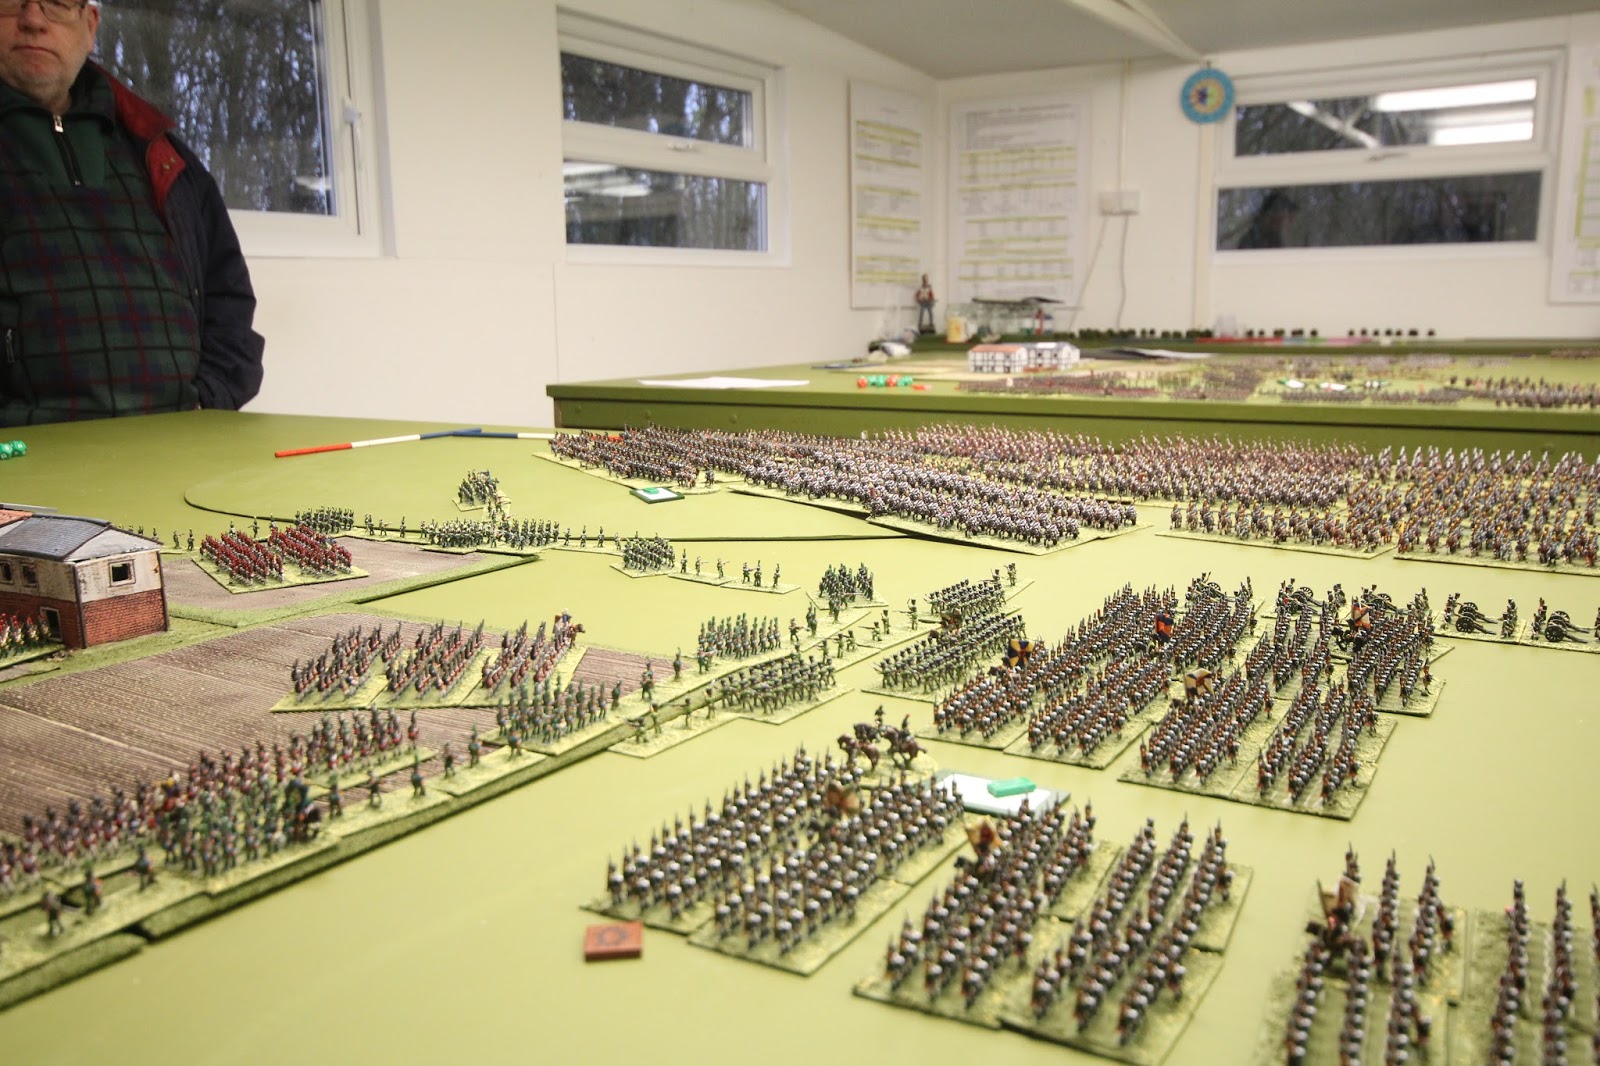
I hope the post illustrates the size and scope of these big games when played with good kit on good terrain with enthusiastic players.
The pics are in chronological order but it would take far too long to try and explain all the action.
That will have to wait until I publish the WWII rules as part of this game. The idea is to have a book with the rules and the whole planning sequence of this game; kit, terrain, OBs, player planning etc along with a commentary of how the game played.


The above are the three tables. Each table is 32.5' long and 6' deep, a playing area of about 600 square feet.
 
 
This pic gives a good idea of player density per table. Space was plentiful as the game utilised all the tables simultaneously, a result of deployment and flank marches.
 
 
I've included this pic as it shows how hidden deployment is done. Numbered markers go on the table and then the kit is placed on the numbered squares on these boards. It does away with the need of maps!!! The on table markers are numbered on one side and plain on the other so that although the other side can view the overall forces they are potentially facing (treat it as top level intelligence), they cannot see the detail. I've taken this system from guys called Grant and Craig who have their own rules called Cornish Combat Command. 
 
 
In the immediate foreground are two of the said on table markers. These are Russian markers.


The caption should read, "is this sheet the right way up?" or "in which building have they hidden the money?"
 
 
This shows the maximum player density, you always need to take care in big games that the action is well spread out.
 
 
Not sure what to say about this one! Attempted camouflage? Pleading for assistance? Laying down the law, literally?!


Two closer style shots showing the action. We had areas of fluid battle in the open, assaults on dug in troops, fighting through villages and woods, the lot!
 
 
The air forces were also there. Each side had about 20 aircraft each, organised into missions.
 
 
I like this pic because it shows a nice model bridge that is the centre of attention of both sides. The Russians would eventually secure both sides, after a week of fighting!!


More general action. All the pics were taken whilst the action was taking place. I mention it so you can note that the use of status markers is minimal. Again, you have to be careful that you don't have a myriad of markers or paperwork on the actual table otherwise it detracts form the spectacle.
 
 
A pic looking up to Kharkov. The Russians never go there, but not for a want of trying. The bridge at the bottom of the pic would survive in German hands until the last day.
 
 
This is the action on the other approach to Kharkov which could be seen in the background of the pic before this one.


Just a pretty battle scene.
So there you have it, lunacy enjoyed by the masses. The gaming was good, it all worked well. The players all played in a good spirit and had a great time, win or not win. Difficult to say there are losers when the event was such a success.
 
The "Supagame" for next year is Borodino 1812. Table size could be up to 810 square feet!! And figure numbers ?!?!?!? I now need to lie down!
Enjoy

Thursday, 3 March 2016

Game 38 : Eylau 1807

This game was fought in December, oops for the delay in posting. Eylau is the famous battle where snow played havoc with visibility and sense of direction and resulted in the Corps of Augerau being effectively wrecked.
This game would see similar results, but the impact was disastrous for the Russians. Eylau is a well known battle so I will leave readers to refresh themselves as to the layout of the battlefield and the opposing forces. The deployment of both sides, as it happened, largely mirrored historic deployment and so without further delay!
 
 
This is the Russian right flank. Eylau is in the upper middle right of the picture


This is a head on view of Eylau viewed from the Russian lines


The Russians started an attack from the right flank. Part of the reasoning, not unreasonably, was to get to grips with the weak French left and hopefully draw reserves I this direction. L'Estoq and Ney were being played historically, both would arrive at some point.


The French plan was similar. Drive forwards on the Russian right, engage until is was unsafe due to numbers and the retire to the original starting positions. The result of this was Soult's smallest Division attacking twice its numbers. But the tactic would pay dividends. The entire Russian wing would end up getting embroiled in this fight.


Augereau advance against the Russian left, predicting the arrival of Davout. The idea is to fix the Russians and then destroy them piece meal. However, the Russians have no intention of just sitting there. They attempt to retire to forma new line, expecting an attack on an exposed flank.
 

The Russians start to redeploy as Davout has started to arrive to their rear. Their timing was quite good and the chase was on to trap these Russians.

 
Davout's flank attack has carried the flank, but unfortunately it has attracted the attention of all the Russian reserves. Davout begins to redeploy to face this onslaught! But help  was at hand.

 
 More Russian reserves preparing to attack Davout.
 

On the Russian right, the fight for the village reaches a pivotal point. The entire French Division is committed against their larger sized counterpart. The end result would be a victory for the French and the capture of the village. It would be short lived as the Russians quickly rally and prepare to retake the village. The French would not trust their luck a second time and so retire.


The French have cleared the first village on the Russian left flank and are now moving to rescue the flank attack itself at the second village. Just behind, you can see the French Reserve cavalry being launched at the Russian left centre where a hinge is being formed as the French force back the left flank.

 
This shows the cavalry manoeuvre from the Russian centre.  
 

The French centre continues with its attack. In the bottom right of the pic, you can see Russian cavalry that initially tried to halt this attack and then found themselves out of position and not being able to use their numbers. They are trying to quickly extricate themselves and redeploy. Not too easy in snow!


The Russian cavalry, along with the Russian reserve, now add their weight against Davout. 


A French man with a smirk as Soult disengages his Division from the village fighting on the left and takes up new positions to face of L'Estoq, who is expected at anytime.


French cavalry begin to swarm through a gap at the Russian hinge. This attack would be the critical part of the battle.


Soult relaunches his attacks on the left flank with his remaining two Divisions. L'Estoq has also arrived. The Russians and Prussians also attack.


The French left repulses L'Estoq's cavalry, just!!

 
Soult's troops advancing with their own cavalry support from massed Light cavalry Regiments.
 
 
And a last[pic just to show the free for all that sometimes occurs. Troops everywhere going in all directions! Great!!
 
 
Well, four of us are having a good time, not sure about the guy in the front!?!?! He's lucky, just retired. Younger than me! Shouldn't be allowed!
The next game will be a short report from a "bout of madness" that has already taken part. A very large WWII game on 600 square feet of table in a hotel with 20 players. I know I am mad, but this just confirms it!!

Sunday, 13 December 2015

Book Notice

Hi Guys,
The first Companion book on the 1809 Danube campaign is available from Caliver. It has maps, OBs and discusses some specific aspects of the rules. Full of actual pics from the actual battles. I hope some of you enjoy it.
Cheers
Ged

Monday, 23 November 2015

Game 37 : La Rothiere 1814

This game is from the 1814 stable and was the first major engagement. It was precipitated by Napoleon deciding to engage a larger allied army and giving it a bloody nose before withdrawing from the field.
This time I've added a map as I intend just talking about the pics. The French lines are from La Rothiere, then east and west in the villages and the lines of communication are to the north. The Allies are deployed in front of the French army.
This turned out to be action all the way and the most dramatic of the medium sized battles fought so far and great fun. I'll leave people to look up the OBs themselves but the French are outnumbered. So they attacked!!

This is looking from Dienville to La Rothiere. Apart from the villages, the terrain is very open.


The French Young Guard, deployed on the right flank, launch themselves against the Allied left flank. This caught the Allies unaware and formations out of position and would hinder the Allies all battle.


Looking from Dienville towards La Rothiere is the Reserve cavalry, primarily Dragoons. These brave men would execute countless charges to keep the Allies fixed in position to allow the right flank attack to gather momentum.


This is the Allied left that faced the French Young Guard attack. The light cavalry would get hemmed in and by the time they extricated themselves the French Young Guard would fall on the infantry supporting them.


Further along the Allied line towards La Rothiere. The French Cavalry Reserve would have to fend off these Divisions for the whole battle. It would be plain sailing for the French.


This is from behind the Allied left. The French cavalry can be seen are trying to keep a distance from a concentration of Allied guns. These guns would ultimately cause heavy losses as the French cavalry would launch many charges.


The Allied centre with La Rothiere just in view. This column is going to attempt to outflank La Rothiere to the left. The Allied cavalry to the top left would protect the flank of this advance.


At the same time, Allied columns were advancing to the right of La Rothiere. A pincer movement was being executed with a screening in the centre of the village.


Towards the Allied right flank, the French in the background are waiting to launch their own attack. The French are waiting to draw the Allies into committing themselves against La Gibrie. The Allies would not play ball forced the French to attack.


The French use the cover of La Gibrie to prepare their own attack. The flank support, yet to be seen, would be the Guard Cavalry which was deployed between La Gibrie and La Rothiere.


The French left flank to the right of La Gibrie. A powerful Allied battery would have to be engaged and silenced to allow this attack to work.


This is the Allied right flank redeploying to face the attack from the French left. The powerful gun line is being constructed. The Allies were weak in cavalry in this sector, a lone regiment can be seen behind the gun line to the left of the pic.


Viewed from the French line just left of La Rothiere, the Allied central attack against La Rothiere is sent in, in force. The French position was well covered and although the fight would last some time, the defenders would hold the day. The church, a significant defensive position, would repulse all assaults that numbered double digits.


The French garrison deployed and prepared to defend against the assault of La Rothiere.


Meanwhile, on the French right flank, the Young Guard are advancing and sweeping all before them. To aid this, the French Reserve cavalry has launched several cavalry charges against Allied guns lines and cavalry supports so that they cannot react to this French movement.


The French cavalry reserve is committed en masse. The Dragoons are off table and now the lights are having to face Allied cavalry that outnumber them significantly. French horse artillery prepares to deploy to aid the cavalry.


The rallied Dragoons now advance after the Allied cavalry were repulsed. All three regiments of this Division would assault the Russian gun line. Losses would be horrible!!


Calmness is restored in La Rothiere as the Austrian assaults are eventually driven back. The Allied would not get a toe hold in the village.


The Allied right wing advance to face the French attack from the left. It would halt when the French Guard cavalry advanced. The extreme right of the line would then come under intense pressure from French infantry.


French infantry executing the left flank assault against the Allied right flank. Russian guns would wreak havoc for a while and the succumb to gradual losses and French charges.


The Allies are trying to organise another assault to the right side of La Rothiere. The central repulsed column can be seen as it reorganises itself.


Here you can see the French left flank assault, above the stick, descend upon the Allied right flank.


The final assault against La Rothiere. The Austrians would give one final attempt, but the French would not yield an inch. The outcome of the battle was decided on the flanks.


The Allied left flank is now crumbling in a piecemeal fashion. Formations are trying to withdraw to escape the French Young Guard "grinding machine" as it inexorably continues to roll up the Allied line. Russian infantry fight bravely but suffer enormous casualties in trying to halt their retreat. 


The French Dragoons execute a last charge against a Russian square on the Allied hinge of their right. I can't remember what happened, but I'll have to make something up for the book!!


The French at La Rothiere have gone over on to the offensive and finally drive the last Austrian assault away from the village. The fight in the centre is over.


The French Young Guard, their victory complete, now drive on the Allied centre, the whole Allied right now withdrawing. The battle has come to a close.


Rogues gallery, all regulars now. It was a great game with lots of surprises and a lot of intense fighting. It also again demonstrated how command & control affects these games when gamers cannot automatically do what they want to do. Frustrating but more realistic!

The next game will be a biggy, Eylau. New snow rules to try out!

And finally, the first "Companion" book to the rules is at the publisher Caliver ready to print. It covers the 1809 Danube campaign and also discusses some rule aspects of "In the Grandest Manner".
Enjoy!