Wednesday 29 November 2023

Game 114 : Battle of Halle, 17th October 1806

 This battle involves a Corps per side as Bernadotte tries to defeat the last remaining Prussian filed force under the Duke of Wurrtemburg.

Bernadotte needs to recover his reputation after not supporting Davout at Auerstadt. The battle involved a lot of town fighting, the town is the key to the whole position. The person controlling Halle effectively wins!

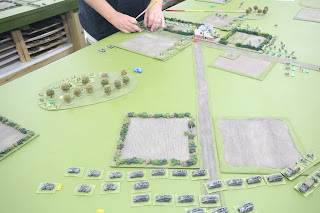
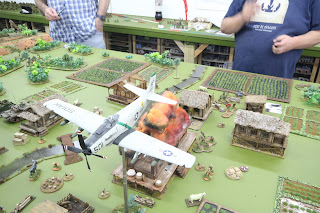
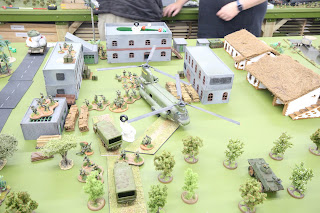
The Prussian start by holding Halle and the French are attacking. Numbers are roughly equal, the Prussian artillery is heavier but the French have an edge in infantry quality. The pic shows the centre and Prussian right. Whilst the Prussian artillery was in position it was able to really hurt the French advance.


On the Prussian left, the Prussian artillery was very affective and allowed this wing to attack the French, especially the cavalry. This would result in the French being forced back and curtailing the action in this sector with the Prussians holding the upper hand.


Back on the Prussian right, the French have got forward and won the cavalry action. The Prussian artillery has also been weakened in this sector. The Prussian right is now flanked. Fortunately, the French cavalry are too weak to exploit this but it does keep the Prussians bottled up.


The French now push hard in the centre. Part of Halle is taken easily, then progress dries up as the Prussian infantry hold off the attacks. Losses for both sides are mounting, but the Prussian right flank is now completely impotent.


At this point, we normally call games but one of the fun parts, not often played in a lot of games, is to see whether the Prussians, who need to retire, can actually do so without the army disintegrating. So we played on. Bizarrely, next turn the Prussians issued orders to all formations, bar one which was the rear-guard, to retire. On average, we would expect half the Prussians to not receive the order based on their General's ratings. This time, all orders were issued successfully.
So the French took Halle and held the field. It was a fairly historical outcome with severe losses as detailed below.

French Formations

Losses %

Prussian Formations

Losses%

Infantry

Cavalry

Artillery

Infantry

Cavalry

Artillery

BERNADOTTE

-

42

11

DUKE of WURTEMBERG


Dupont

26

-

-

Roggenbach

28

-

39

Drouet

18

-

-

Wurtemberg

13

-

0

Raffiniere

21

-

-

Winning

13

24

9

Grouchy

-

26


Netzmer

-

74

25


Hinrichs

55

-

-


The losses were heavy for both sides, all arms suffering severe casualty rates. This was a very bloddy affair.


Nice sunny day, great game, now more beer and chinese food this evening. Next stop is bacl to 1814 and Brienne.

Wednesday 8 November 2023

Game 113 : Escape to Dunkirk

 This was a made up battle simulating, very loosely, an escape to Dunkirk by Allied forces. The Brits had an infantry Division of 9 btns, an armoured Brigade of 2 tank btns and an Armoured car regiment, along with a French infantry Brigade. Also present was the Brit Divisional artillery of 6 Regts

The Germans had a Panzer Division and most components of a Motorised Division. The Germans had no supporting field artillery but did have "random" Luftwaffe support and a Fallschirmjager btn that could be air transported in to an airfield behind Allied lines at any time the German wished.


This is the left of the German lines where the Pz Div AC Regt was racing with Engineers and Gepanzert Infantry. At the top of the pic, out of sight, is a double river which the Brits must hold to allow the outlying troops to collapse the perimeter and then escape along a sinlg road over 2 bridges.


Germans advancing in the centre against the French Brigade. The French were dug in in foxholes along the approaches the Germans would have to take.


Brit armour in the background advances. This battle was mainly an infantry engagement, the German tanks taking all necessary action to avoid a direct tank fight against superior Brit tanks.


A view of the double river, the bridges and the escape road. Towards the top of the pic is the airfield. Although the battle was "made up", it did still create the flavour of the time and reflected the abilities of the forces involved. Out of the 5 Allied Brigade equivalents deployed, we reckoned that 3 should make the escape road. A fun change as we had not done WWII for a fair while. More WWII next year.


Rogue's gallery as usual. It was nice to see some guys who hadn't been for a while. I believe "Steve" is enjoying his late afternoon G & T!! Yes, we are very civilised now. Onwards to the next game!!!


Sunday 8 October 2023

Game 112 : Gettysburg - 2nd Day

 Again, this is fairly new. This is a continuation of Gettysburg day 1 which was fought 4 years ago! As I think everyone know about Gettysburg, I'll just enclose some pics without much commentary. The scale this time was 15mm.

The blog is playing tricks today, it listed the pics in reverse order. So you will have to go to the end and start from there this time!

Confederates advancing after having secured Cemetery Hill. It took hard fighting, the Union Iron Brigade never broke, it fought until there was nearly no one left!!

This is Devil's Den and the approach top Little Round Top. The fighting hot "claggy" but the Confederates were slowly pushing through.

Confederates clear "the angle" and begin to dominate Cemetery Ridge. Cemetry Hill and Culp's Hill are about to be flaked.

This was the key action that decided the battle would be a Confederate victory. Anderson's Division from III Corps has smashed into the Union III Corps. The action was between the "Wheat Field" and "the angle". After two bizarre combats, both Union Sharpshooter units were eliminated by the Confederates. It had two immediate affects. The first was to severely weaken this area of Union Infantry, but the loss of the two units resulted in the overall Brigade command retiring. The Union never recovered to forma stable line, right in the centre of the main line.

Confederates advancing through the Wheat Field to try and turn the Union left flank on Cemetery Ridge.

Confederates clear Cemetery Hill. The slow advance continues against stout defence.

Action from Culp's Hill around the Cemetery Hill. Culp's Hill would be held by the Union army until we called the game.

We're all now enjoying our lunch. We do look very intellectual!! Next stop is "Retreat to Dunkirk"


Thursday 7 September 2023

Game 111 : A Fire Base in Vietnam

 This will totally different. This game was set in and around a Fire Base in Vietnam. The scale is 1/48 and we have US Marines with ARVN & ANZACs against the baddies.

The system is very similar to "Sans of Sudan", so the "US" side are the players and the Vietcong/NVA are umpire controlled via a card system. 

The kit was supplied by Dave and Martin, the rest of us were the hoped to be canon fodder. 

I'll leave the pics to speak for themselves but we did manage to play the game through to the designed end where the "US" did achieve their objectives with acceptable losses.


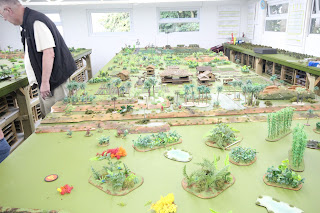
Both tables were completely covered in some form of jungle. At the far end of the table is the the Fire Base. Off the bottom of the table is a delta type water feature. The ARVN commander is standing in a river, that splits the battlefield, looking at the ARVN forward positions in a "Michelin" factory, I kid you not! We mustn't lose it. There is only a single bridge linking both sides and that is next to the Fire Base. The "ridgeline" that you can see is thought to house lots of baddies, dug in with tunnels, trenches etc.

The "US" forces need to clear both tables of enemy.


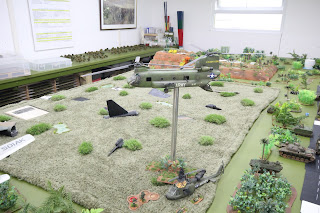
This shows the Michelin factory and behind the Chinook, you can see "a grassy area" where a B52 has put down!!


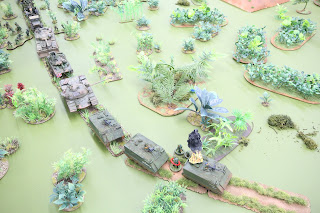
Armoured column from the Fire Base advancing on a "friendly village" ahead of the enemy ridgeline with the baddies.


A Huey has gone down. There are wounded air crew and ARVN. The Chinook comes in "hot" to airlift them out, including the wrecked Huey!!!


The earlier "friendly village" turns out to be no longer that friendly. The Sky raider takes out the central complex!!!!!!


Heavy fighting in the Michelin factory results in ARVN and civilian casualties. The Chinook is again tasked to airlift them out from the complex. It even survives a RPG strike!!!!!


The bunch of lunatics, I need say no more!!!!!!! And the main disaster is that I wanted better air support, so I've gone and bought a F4-C Phantom (last built a model in 1977). I confirm I'm as mad as a hatter!!!!!!!!!!


Wednesday 9 August 2023

Game 110 : Battle of Ocana : take 2

 We turned the battle of Ocana around and refought the battle. In a nutshell, the new rules for villages work for the Peninsular, they need testing for the European theatre. 

The Spanish tried to mix up the troops facing the French so that they weren't all blocks. The problem for the Spanish would be the same, the cavalry have poor elan and so never make headway. 

The Lancers nearly covered themselves in glory, nearly broke French infantry, but nearly isn't enough!


This is the Spanish Right wing where you see the mix of troops to try and stop the French. I was attempting to ensure that all support fire was maximised. That is a continuous struggle for the Spanish.


The village of Ocana itself is a situation where you try to hold by trading losses, then hope to rotate the lead units out of the line. That is always fine in theory, trying to execute such ideas always becomes fraught.


The Spanish left, where the task is to try and not get outflanked, but also maintain the front line contiguous with Ocana itself. The weight of the Spanish Cavalry, 75% of it is on the right. So only a single Brigade in this area.


The right is where the Spanish performed best, partly influenced by the fact that this was the weakest flank, with respect to infantry, for the French. It was a continual struggle to try and get any initiative in this sector, this was where the Spanish had to make headway. It didn't happen!


Despite heavy losses, the Spanish bravery was insufficient to maintain the grip on Ocana. Slowly, but surely, the French were driving into Ocana.

The result on the left was inevitable. The flank was slowly being turned. The Spanish made no inroads in any sector and it was clear that they would have to withdraw.

The overall game mechanics worked well. The new way of reflecting the Spanish capabilities worked very well.


Play Test 1


French Formations

Losses %

Spanish Formations

Losses%

Infantry

Cavalry

Artillery

Infantry

Cavalry

Artillery

SOULT


Arzeiga


Sebastiani


Zayas

0

-

13

Leval

2

-

0

Lacy

29

-

0

Werle

4

-

8

Vigolet

1

-

21

Paris

-

14

33

Giron

7

-

0


Castejon

0

-

38

Mortier


Zerain

6

-

0

Girard

5

-

0

Jacome

0

-

4

Gazan

19

-

0

Copon

19

-

46

Beauregard

-

2

4

Bemuy

-

2

25


Rivas

-

9

33

Milhaud

-

12

54

March

-

31

29

Desolles

8

28

4

Ossorio

-

3

38

Spanish artillery losses were especially high. Although its most powerful arm, it was sniped at for most of the battle.


Snug under cover after the game, its now beer and a Chinese meal! The next game will be another first for the Situation room, so watch this space.