Monday 17 November 2014

Game 27 : Battle of Mockern : October 16th 1813

This was the Battle of Mockern, to the North of Leipzig and known overall as the Battle of Nations. The game would pitch the Army of Silesia, marching via the northern roads to attack Leipzig, their paths blocked by Marmont and his forces. The allies would have advantage of numbers in all arms, most noticeably artillery and cavalry. The French have a good defensive position, the front resting on the villages that screen the north of Leipzig. The main road to Leipzig is in the background and runs next to the river Eslter. The is a road in the centre and in the foreground is a road to the right of the French line. The picky is taken to the south of the battlefield, looking west and are the rear areas of French deployment.
 

The picky below shows the northern part of the battlefield, including the French front line and the approaches that the allies must take


This next picky is taken from the north, looking south and is the left of the allied line. It is the village of Widderitsch and is occupied by Dombrowski's Polish troops


The village in the centre is Lindenthal and is to be occupied by one of Marmont's three divisions


Over on the allied right is the village of Mockern, occupied by another of Marmont's divisions. Marmont's third division would be held in reserve, a duty it would manage to fulfil for the entire battle.


The Prussian plan was to mask the villages with minimal amounts of infantry, advance their main  infantry forces between the villages and use their superior weight of cavalry on their open left flank. The French plan was to hold the villages with infantry and the gaps in between with cavalry. A French reinforcing division, Souham, would be arriving on the French right flank with supporting cavalry and would be immediately engaged with a day long battle against superior numbers of allied cavalry trying to push in the French right flank. 


An allied infantry division masses between Lindenthal and Widderitsch. Its progress would be painfully slow and they would ultimately get handle roughly by Polish light cavalry counter-attacking in the centre, contesting the ground.


Another shot of a second Allied infantry division amassing between the two same villages. The failure to undertake attacks on the key villages, to at least tie down French infantry, would allow the French too much reaction time to threats as they appeared in a more or less piecemeal fashion.


Lindenthal, the village in the centre, was never seriously threatened. The French infantry stationed there were able to react to the Allied infantry pushing forward in the centre. The Allied advance was initially checked by French infantry and then thrown back by Polish light cavalry.


Massed ranks of Russian cavalry on the Allied left. They would successive attacks throughout the day and the French would be hard pressed to hold them. Although the Allies would be ultimately held, it did stop the French was having Souham reinforce their centre, a consequence where the French were lucky that he was not required.


The piccy below shows the Polish light cavalry forcing back the two allied infantry divisions in some disorder. Cavalry rallying on the spot, facing any direction, is now a very dangerous potential situation for infantry that suddenly find themselves without cavalry support.

 
The last battle piccy showing the Russian cavalry attacking on their left flank. This was probably the third major attack that the Allied cavalry had made. The French would prevail, but not without suffering serious losses. The Allies also lost heavily, but they had more reserves. Fortunately for the French, nightfall would see the French still secure along the entire line and still an intact infantry division held in reserve. The Allies were not in any way broken but would use nightfall to lick their wounds


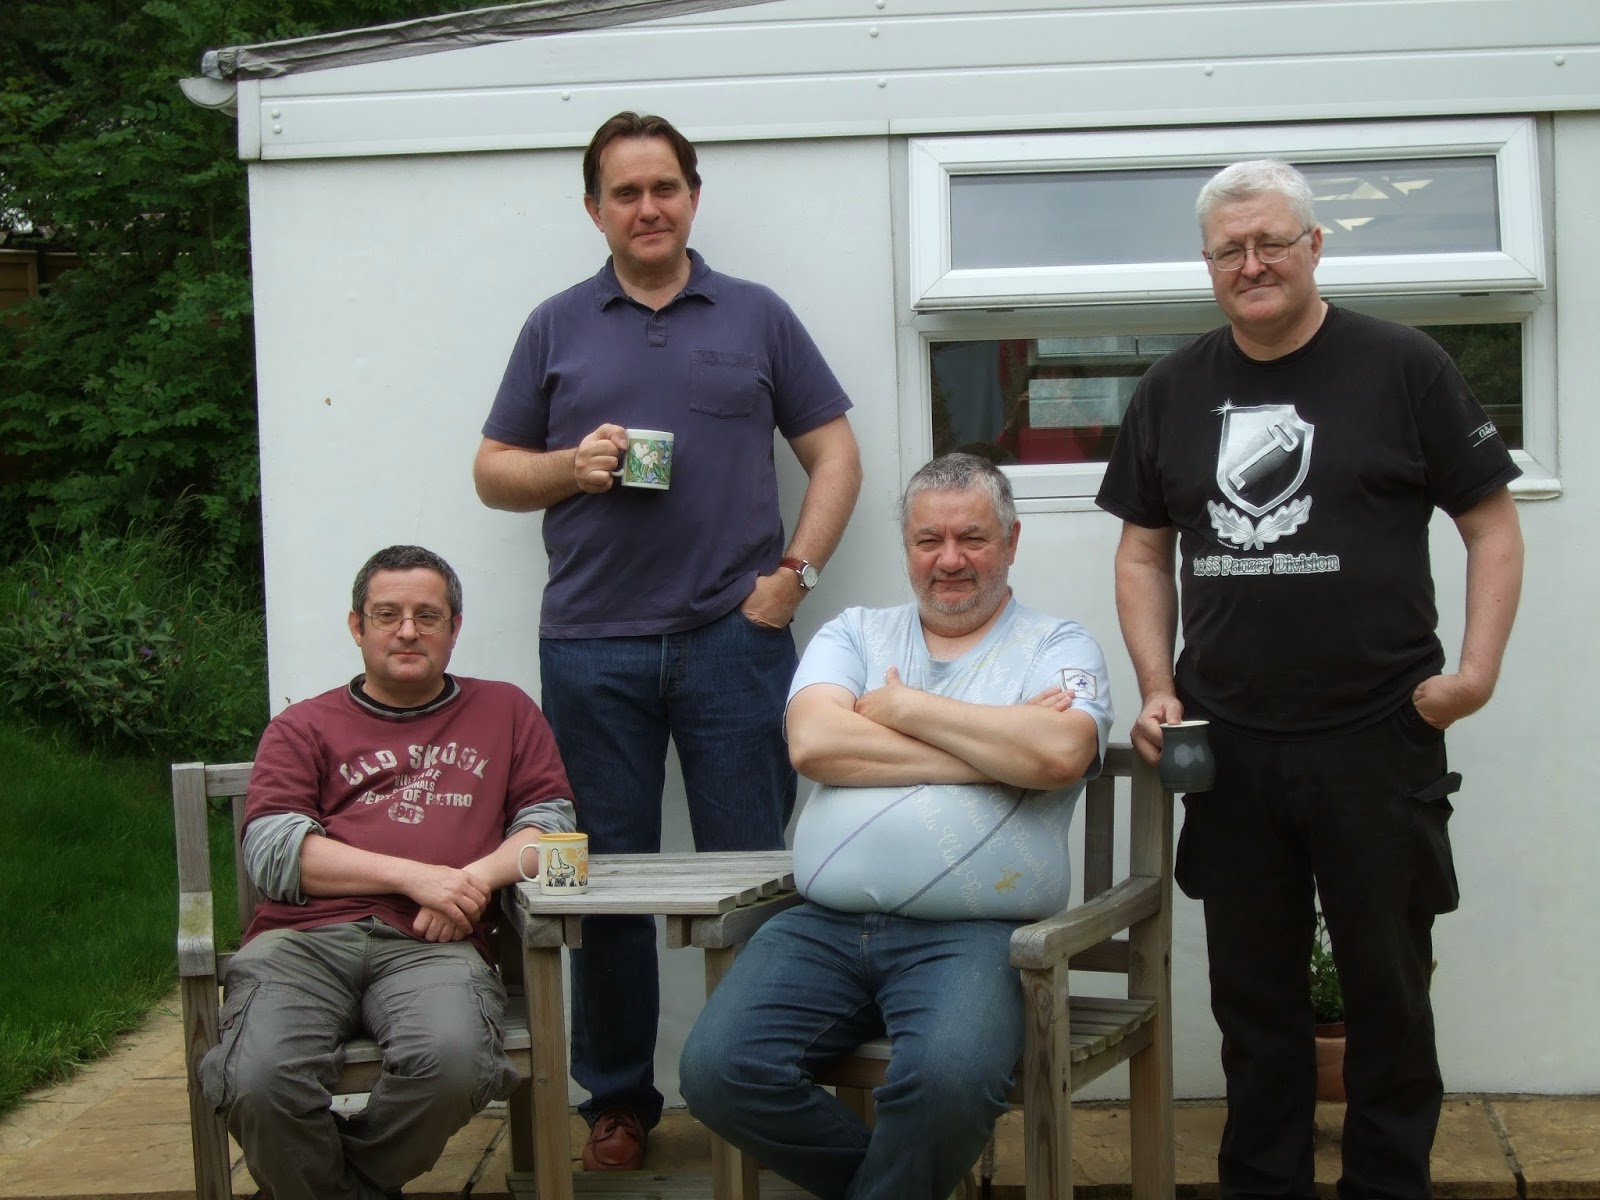
And to finish, rogues gallery. All the players were regulars, apart from John Smith (yes, it is his real name and he isn't incognito). John is likely to become a regular and is a whizz with cameras, He has already started showing me how to get the best out of my camera. The results this time are shots that are better lit and in forthcoming publications it will be the editing and sizing of high resolution piccies that will be exploited.
 

The next game is Borodino, complete with the Great Redoubt, Fleches and armies that are quite large (no exaggeration!!). Hurrah!!!!

Tuesday 28 October 2014

Game 26 : Aspern Essling : Again!

This old cherry had yet another outing! Why? Well, the terrain had changed, the troops were all correct types and numbers and the rules were used in their entirety. The game appears to be small when you read the history, but in game play the game would take 2 full weekends to game. The first weekend would be day 1 of the battle and the second weekend would be day 2.
 
The piccies are in an odd order this time. I'm starting with the random piccies and the rogues gallery!
The first picky is a close up of French chasseurs. It demonstrates the quality of casting available in this scale and the detail that you can get.


Below are the rogues for the first day. All regulars at the Situation room, the French were myself, Gordon (top, second from right) and Nick (top, middle). The Austrians were Keith, Brian & Steve (remainder of top) and Graham (next to me).


 This next picky is in just to show the extent of combats that occur. This is a fight between 2 light cavalry divisions, one of French chasseurs and the other Austrian hussars. The French would hold on, principally because of the support fire delivered by the French battery in the foreground.


The gallery for the day 2 battle. The Austrians were now Paul (top row left), Bob (top row, second right) and Graham. The French were Alan (top, right end), Gordon and myself


The new Granary model. I got this from Old Glory. Paints up nicely.


This was the new church as Aspern. The bottom of the model is Old Glory, but the spire I got from Pendraken who market Total Battle Miniatures (the church itself has a foot print that didn't suit me). I just married the two together with some Urethane high density foam.

 
These are some piccies from day 1. The first is taken from the French centre looking out towards Essling. You can see French chasseurs in the foreground moving out towards Austrian hussars in regimental line. Each Austrian regiment represents over 1,000 troopers. As these regiments are huge, the Austrians are given options prior to the game as to how the regiments may be split if they so wish. However, for this battle, the Austrians elected to keep the regiments intact.


The next picky shows the Austrian assault on Aspern. The French would throw this assault back. The Austrians were trying to really screen the village and move the bulk of their forces to the centre. The fact that the French would securely hold Aspern throughout the day would mean that fewer reinforcements would be assigned to this sector overnight.


More action from the Austrian centre left. This is an Austrian Corps advancing, its flanks supported by cavalry and a jaeger regiment thrown out to screen its advance.


This is Essling coming under sustained assault. The French division holding this village would lose about half of it up to nightfall. The granary itself would hold out but the casualties on the granary garrison, now cut off form the rest of the village, were mounting and becoming serious.


Another picky showing the Austrian advance in the centre. This threat would lead to the French committing the Cuirassier divisions into the centre. The end result would be the halting of the Austrian forces and the Austrians then setting up a gun line. The end of day 1 would see the French in total control of Aspern, the centre and partial control of Essling, most importantly the granary.


Day 2 saw both sides reinforced and some redeployment overnight. The Austrian plan was to attack in the centre and hold onto the gains at Essling. Aspern was determined to be a quiescent sector because of the day 1 result and we were lacking enough players.
The picky below shows the French counter attacking Essling. The granary garrison held off an initial assault, but the losses were now critical. Fortunately for them, there was a lull in fighting, enough for them to extricate themselves and be replaced by the Fusilier Chasseurs of the Middle Guard. They would not now be shifted!


The French are also counter attacking between Essling and the centre where the Austrian infantry is now weak. This would secure the whole of Essling towards the centre. The parts of Essling lost on day 1 would be retaken, largely down to the Fusilier Grenadiers of the French Middle Guard advancing with the bayonet.


The French are now also advancing in the left centre with a reserve division supported by the French Reserve Cavalry. The Austrians would now be forced onto the defensive against this threat. To face this threat, the Austrian Reserve Cavalry is ordered to advance. It would be a race to see which attack would be delivered first.


Two French cuirassier divisions, supported by the duty squadrons of the guard, smash into Austrian light cavalry. The Austrians would get badly mauled and fall back. This would leave the cuirassiers to engage the Austrian foot, time enough for French infantry to attack on their centre left. The conclusion of the battle was the French holding off the Austrians. The French attack in the centre would be halted by the Austrian cuirassiers arriving to save the threatened infantry.
 
There was more ebb and flow, mostly as a result of the game being played over an extended time. About 5 days of battle and an impasse!!  Quite historical really.


A piccy taken form Essling looking along the French line of deployment.


A similar piccy taken from Aspern looking along the French line of deployment.

All in all the games are playing as expected. A "traditional" battle will take a minimum of 3 days to play out properly. Slightly smaller games will do the same in a setup day and 2 days of gaming. The rules are working well, and as planned, and the guys playing are getting used to the nuances and subtleties of the rules.
Next game Mockern


Friday 19 September 2014

Game 25 : Action in Greece

This was a game, set in Greece, in 1941. Neither side knew the OB of the other. Each side were given a set of forces, each with a points value and a number of points to effectively buy an army. It was an encounter game and I developed an abstract reconnaissance system. The objectives were as follows. The Germans were to clear and hold the main highway and push back or destroy the British forces. The British were to control the main highway, keeping it open and deny the Germans the control of the same highway. The idea was that the Germans were coming out of the mountain passes and the British were protecting their lines on communication to the ports.

The German forces would be based on "Das Reich" Motorised division with a maximum tank complement of 3 Stugs and 3 Pz IIIs. This is a top notch formation. The infantry components are treated as standard infantry for rate of fire, not enhanced as in later years.

The British forces would be based on components of a British Infantry division with transport, one without transport and an Armoured division. There was also the added flavour of British Guards, Highlanders and normal experienced regulars.

The Germans have air support along with air supremacy. Although there was a virtual guarantee of German air support during the game, how much would appear and when and where was randomly generated. The Germans were grateful when it arrived but had no other control on the aircraft.

The first two piccies show the battlefield. North is to the left and west is nearest shot. This is the southern half of the battlefield. There were only two villages on the battlefield, both along a central main highway. There were two other north/south roads, one to the east and the other in the foreground to the west.
 
The German army was based on 2 Motorised Infantry Regts, a Reconnaissance btn, a Stug company and a towed Panzerjaeger btn. The British army was based on an 2 Infantry brigades with transport, one without transport and a Reconnaissance Regt from an Infantry division. None of the armour was selected!


The action would be virtually all fought on the southern table sector. The reconnaissance saw the British set up in quite an advanced position in the East, but very close to the southern edge to the west and about in the middle of the battlefield in the centre.

To surmise, the British attacked on the eastern road with an Infantry Brigade supported by most of the reconnaissance regt, against a German column based on 2 Motorised btns with 3 Stugs and half the reconnaissance btn, also attacking. This fight would hang in the balance for quite a while until the British eventually ran out of offensive steam and began a dogged withdrawal.

In the Centre, a British Infantry Brigade, with little armour of any description, was quickly forced to mount a defence based on the village, furthest south on the main highway. It would take the German attacking force of 2 Motorised btns, supported by both regts heavy weapons, most of the weekend to box the British into the village and surrounding area.

To the west, the British attempted to get forward from a poor starting position with an Infantry Brigade and reconnaissance company. The Germans exploited there good starting position with 2 Mororised btns supported by the other half of the reconnaissance btn. The main battle would take place in a large wooded area, not far from the southern edge, with German firepower eventually prevailing.

Some piccies of the action.


This is the taken from the Garden areas which are just to the right of the village in the piccy below, so the village is to the immediate left. These Stukas arrived and played havoc with the infantry!! The number of Stukas, the road they arrived on and the direction they were travelling, was all random. Aircraft had target priorities if multiple targets were visible.


This shows the village on the main highway. It took a short amount of time for the village to be the key focus of fighting in the centre. The British were always on the defensive and somewhat bottled up. Progress by the Germans was slow, but speed and casualty rate are a fine balancing act!


The above is from the road on the west of the battlefield. The fighting would concentrate on this wood and the surrounding enclosures.


Graham, in the centre, either looking at the bad news coming towards him or telling off those nasty Germans.


Me in the foreground, looking at how to prise open the village defences. Pete and Gordon in the background, fighting tenaciously over the eastern road. Pete would eventually start giving ground, grudgingly!


The above piccy and the rest that follow are from a different camera with a professional man doing the piccy taking. John Smith is behind the lens and has managed to escape the other photographs!


The above piccy shows how transport is done. Vehicles are assigned to companies and is also a fixed asset. If a truck is destroyed, then that formation has lost some transport for the duration of the battle.


Another piccy of the intense fighting in the woods on the western road. The Germans prevailed through weight of firepower, but it was a slow and not easy advance. Casualties on the German side were mounting, but the British were being sucked into the killing area.

 
Below is a wide angle shot of the village on the main highway. It also shows German armoured cars now working to the southern board edge to completely cut off the British brigade now in this area.


This is the same village, piccied form the southern board edge looking north westerly. The troops on the right edge of the picture are German, the enclosure of the village and the troops in it is nearly complete.
This saw the end of the game. The troops density was the lowest we had used for some time and all formations had a wide area over which to manoeuvre. The Germans were slightly surprised at seeing no British tanks. The British tactic was to try and hold the centre and western road and advance and achieve victory on the eastern road. The German approach was to have the faster elements on the eastern and western roads and methodically crunch through the main road. The conclusion was that the British would have to withdraw or seriously risk being cut off and eliminated a static pockets.

The next jaunt will be back to 1809 and the battle of Aspern Essling again. It will be very different with more terrain in that the Granary and church are there, all the troops are there and all the rules are being played, including command and control.

Ged


Monday 28 July 2014

Game 24 : Twin battles of Abensberg & Eckmuhl in 1809

 
This was a week long escapade where we played two games. Abensberg & Eckmuhl . The battles occurred very close to each, time wise, in the 1809 Danube valley campaign. Both battles were linked with Davout's attempt to escape the main Austrian army before Napoleon would arrive to save the day.
 
Abensberg is the first battle we played where Napoleon has arrived. It starts with the Austrians facing a weak French deployment and the French get massively reinforced, with a major part appearing on an Austrian flank. I'll leave people to read the history themselves but suffice to say that both battles are very similar in setup.
 
The difference, game wise, was that in the past, these battles were played as one. This meant that as the game was new, neither side was quite sure what to expect or suspect. What worked great was the French idea of acting very aggressively with their starting forces and then await the flank attack hammer blow. The Austrians knew they outnumbered the French at the beginning, they knew that they themselves would be reinforced and that inactivity would play into French hands.
 
The Austrians decided to be cautious and deployed their weight against the flank where their reinforcements were expected. The pictures below show some of the action from the game.
 

This picky shows the new tile system I have developed. A single tile represent s a Division of something. It could be as little as two regiments of cavalry or as large as fifteen battalions of infantry with artillery support. This generates the fog of war. There are restrictions and limits as to where troops can deploy when "seen" and this will get covered in more depth in a future publication.


The weak Austrian flank, held by a cavalry formation supported by Grenzers. They are manoeuvring to try and flank the French who are in the background, beyond the village. Little did they know that the main French flank attack would arrive in this position.


After a slow start, Austrian cavalry also advance in the centre against what looks like a small French infantry division. The cavalry you are looking at is a single regiment of Austrian Hussars with an other regiment to the right of the picky


This is the same situation form a different angle and taken further back. The Austrian cavalry would eventually attack the French line to the top of the piccy.


French cuirassiers, from the flank attack, arrive and immediately engage the Austrian cavalry. The Austrian Grenz has been forced into square and the French cavalry would ignore them and leave them to their arriving supporting infantry.


This shows more general action in the same area. The French cavalry to the bottom right are pushing past the right of the village to reinforce the French infantry in the centre. The Austrian cavalry to the left of the picky has already been defeated in action and is retiring in an attempt to reorganise. The village is still firmly in Austrian possession at this point.


Some time later sees the French cavalry having completed their manoeuvre to the French left centre and are now beginning to attack the Austrian infantry in order to provide relief to the French infantry in this sector. To the bottom left can be seen French infantry from the flank attack arriving and also manoeuvring to support the French centre. There is also another French infantry division, out of shot to the left, assaulting the village in the picky from the left.


French cuirassiers, supported by infantry in the centre right, prepare to assault Austrian infantry squares. Nansouty would personally lead the assault


Pictured form the other side, the French cuirassiers charge the squares and "break" two of them. Supporting infantry would attack the remaining squares and see them off.


This sums up the Austrian situation on the flank of their army. The cavalry, centre right, is Jacquinot's French light cavalry and has just ridden through three battalions of retiring Austrian infantry. The gun battery in the foreground would be the next victim!

The next battle, Eckmuhl, would play differently. The setup is very similar, a smaller French force and a large hammer blow on a flank. The big difference this time was that the players were now expecting this type of occurrence. In fact, the first days play was nearly all manoeuvre where the Austrians were taking their head out of a noose and trying to realign their army. Being able to play these games over days does enable this type of historic situation to happen and be allowed to develop. Some piccies from this game.


This was the start of the French flank attack. Infantry moving to assault a village behind the left flank of the Austrians. The Austrians had the foresight to garrison this village, Eckmuhl as it happens, and all the cavalry in shot is Austrian cavalry that had advance but is now trying to issue new orders and redeploy to remove itself from being trapped by this flank attack.


I'm struggling to remember this picky, but it is from the other end of the battlefield where more Austrians arrive from Ratisbon, reinforcing the stronger flank of the main army.


This picky is all Austrian. The Austrian infantry in the centre is redeploying in knowledge of the French flank attack arriving. Austrian cavalry is attempting to get to the front, through the traffic jam, to screen this manoeuvre.


Three French divisions can be seen advancing on mass to engage. The "tail" of French is a division redeploying from the centre of the French line, to its extreme flank. A very dangerous manoeuvre in the face of the enemy, but the Austrian redeployment allowed this to happen without incident.


More French divisions move up to the attack.


This is the main lines of both armies now engaged. The village was now the left of the Austrian line and is being assaulted by a crack French division. Austrian Grenadiers are in the foreground, supporting the defence of the villager and attempting a general counter-attack.


Total mayhem at eh critical point. The village was the hinge of the Austrian line, now deployed at 90 degree angle from this village. The French would commit two divisions to this assault and the Austrian two in defence. The outcome would be uncertain for a good number of turns.


The French eventually carry the day and open up the Austrian main line which begins to unravel.
A great weeks wargaming, enough time for all the rules to be used and also to allow the battles to develop from the game starts with fewer troops in position and many more arriving.


Regular faces of the Generals attending both games. I forgot to take a picky of two other guys who played in the first game, but I'm sure they won't mind.

Other news. The rules should be available to purchase from Caliver at the end of this week. They look very smart and have lots of piccies from the Situation room included.
There will be more publications, the first of which I am working on. There will be a companion set of books covering specific battles. They will include all the OBs, maps and indications of deployments and some piccies of actual gameplay from the games. The first one will be the 1809 Danube Campaign. In addition, each of these books will cover a specific aspect of the rules, in greater depth, a feature if you like.

That's all for now. I've another write ready, probably next week.