Friday, 19 September 2014

Game 25 : Action in Greece

This was a game, set in Greece, in 1941. Neither side knew the OB of the other. Each side were given a set of forces, each with a points value and a number of points to effectively buy an army. It was an encounter game and I developed an abstract reconnaissance system. The objectives were as follows. The Germans were to clear and hold the main highway and push back or destroy the British forces. The British were to control the main highway, keeping it open and deny the Germans the control of the same highway. The idea was that the Germans were coming out of the mountain passes and the British were protecting their lines on communication to the ports.

The German forces would be based on "Das Reich" Motorised division with a maximum tank complement of 3 Stugs and 3 Pz IIIs. This is a top notch formation. The infantry components are treated as standard infantry for rate of fire, not enhanced as in later years.

The British forces would be based on components of a British Infantry division with transport, one without transport and an Armoured division. There was also the added flavour of British Guards, Highlanders and normal experienced regulars.

The Germans have air support along with air supremacy. Although there was a virtual guarantee of German air support during the game, how much would appear and when and where was randomly generated. The Germans were grateful when it arrived but had no other control on the aircraft.

The first two piccies show the battlefield. North is to the left and west is nearest shot. This is the southern half of the battlefield. There were only two villages on the battlefield, both along a central main highway. There were two other north/south roads, one to the east and the other in the foreground to the west.
 
The German army was based on 2 Motorised Infantry Regts, a Reconnaissance btn, a Stug company and a towed Panzerjaeger btn. The British army was based on an 2 Infantry brigades with transport, one without transport and a Reconnaissance Regt from an Infantry division. None of the armour was selected!


The action would be virtually all fought on the southern table sector. The reconnaissance saw the British set up in quite an advanced position in the East, but very close to the southern edge to the west and about in the middle of the battlefield in the centre.

To surmise, the British attacked on the eastern road with an Infantry Brigade supported by most of the reconnaissance regt, against a German column based on 2 Motorised btns with 3 Stugs and half the reconnaissance btn, also attacking. This fight would hang in the balance for quite a while until the British eventually ran out of offensive steam and began a dogged withdrawal.

In the Centre, a British Infantry Brigade, with little armour of any description, was quickly forced to mount a defence based on the village, furthest south on the main highway. It would take the German attacking force of 2 Motorised btns, supported by both regts heavy weapons, most of the weekend to box the British into the village and surrounding area.

To the west, the British attempted to get forward from a poor starting position with an Infantry Brigade and reconnaissance company. The Germans exploited there good starting position with 2 Mororised btns supported by the other half of the reconnaissance btn. The main battle would take place in a large wooded area, not far from the southern edge, with German firepower eventually prevailing.

Some piccies of the action.


This is the taken from the Garden areas which are just to the right of the village in the piccy below, so the village is to the immediate left. These Stukas arrived and played havoc with the infantry!! The number of Stukas, the road they arrived on and the direction they were travelling, was all random. Aircraft had target priorities if multiple targets were visible.


This shows the village on the main highway. It took a short amount of time for the village to be the key focus of fighting in the centre. The British were always on the defensive and somewhat bottled up. Progress by the Germans was slow, but speed and casualty rate are a fine balancing act!


The above is from the road on the west of the battlefield. The fighting would concentrate on this wood and the surrounding enclosures.


Graham, in the centre, either looking at the bad news coming towards him or telling off those nasty Germans.


Me in the foreground, looking at how to prise open the village defences. Pete and Gordon in the background, fighting tenaciously over the eastern road. Pete would eventually start giving ground, grudgingly!


The above piccy and the rest that follow are from a different camera with a professional man doing the piccy taking. John Smith is behind the lens and has managed to escape the other photographs!


The above piccy shows how transport is done. Vehicles are assigned to companies and is also a fixed asset. If a truck is destroyed, then that formation has lost some transport for the duration of the battle.


Another piccy of the intense fighting in the woods on the western road. The Germans prevailed through weight of firepower, but it was a slow and not easy advance. Casualties on the German side were mounting, but the British were being sucked into the killing area.

 
Below is a wide angle shot of the village on the main highway. It also shows German armoured cars now working to the southern board edge to completely cut off the British brigade now in this area.


This is the same village, piccied form the southern board edge looking north westerly. The troops on the right edge of the picture are German, the enclosure of the village and the troops in it is nearly complete.
This saw the end of the game. The troops density was the lowest we had used for some time and all formations had a wide area over which to manoeuvre. The Germans were slightly surprised at seeing no British tanks. The British tactic was to try and hold the centre and western road and advance and achieve victory on the eastern road. The German approach was to have the faster elements on the eastern and western roads and methodically crunch through the main road. The conclusion was that the British would have to withdraw or seriously risk being cut off and eliminated a static pockets.

The next jaunt will be back to 1809 and the battle of Aspern Essling again. It will be very different with more terrain in that the Granary and church are there, all the troops are there and all the rules are being played, including command and control.

Ged


Monday, 28 July 2014

Game 24 : Twin battles of Abensberg & Eckmuhl in 1809

 
This was a week long escapade where we played two games. Abensberg & Eckmuhl . The battles occurred very close to each, time wise, in the 1809 Danube valley campaign. Both battles were linked with Davout's attempt to escape the main Austrian army before Napoleon would arrive to save the day.
 
Abensberg is the first battle we played where Napoleon has arrived. It starts with the Austrians facing a weak French deployment and the French get massively reinforced, with a major part appearing on an Austrian flank. I'll leave people to read the history themselves but suffice to say that both battles are very similar in setup.
 
The difference, game wise, was that in the past, these battles were played as one. This meant that as the game was new, neither side was quite sure what to expect or suspect. What worked great was the French idea of acting very aggressively with their starting forces and then await the flank attack hammer blow. The Austrians knew they outnumbered the French at the beginning, they knew that they themselves would be reinforced and that inactivity would play into French hands.
 
The Austrians decided to be cautious and deployed their weight against the flank where their reinforcements were expected. The pictures below show some of the action from the game.
 

This picky shows the new tile system I have developed. A single tile represent s a Division of something. It could be as little as two regiments of cavalry or as large as fifteen battalions of infantry with artillery support. This generates the fog of war. There are restrictions and limits as to where troops can deploy when "seen" and this will get covered in more depth in a future publication.


The weak Austrian flank, held by a cavalry formation supported by Grenzers. They are manoeuvring to try and flank the French who are in the background, beyond the village. Little did they know that the main French flank attack would arrive in this position.


After a slow start, Austrian cavalry also advance in the centre against what looks like a small French infantry division. The cavalry you are looking at is a single regiment of Austrian Hussars with an other regiment to the right of the picky


This is the same situation form a different angle and taken further back. The Austrian cavalry would eventually attack the French line to the top of the piccy.


French cuirassiers, from the flank attack, arrive and immediately engage the Austrian cavalry. The Austrian Grenz has been forced into square and the French cavalry would ignore them and leave them to their arriving supporting infantry.


This shows more general action in the same area. The French cavalry to the bottom right are pushing past the right of the village to reinforce the French infantry in the centre. The Austrian cavalry to the left of the picky has already been defeated in action and is retiring in an attempt to reorganise. The village is still firmly in Austrian possession at this point.


Some time later sees the French cavalry having completed their manoeuvre to the French left centre and are now beginning to attack the Austrian infantry in order to provide relief to the French infantry in this sector. To the bottom left can be seen French infantry from the flank attack arriving and also manoeuvring to support the French centre. There is also another French infantry division, out of shot to the left, assaulting the village in the picky from the left.


French cuirassiers, supported by infantry in the centre right, prepare to assault Austrian infantry squares. Nansouty would personally lead the assault


Pictured form the other side, the French cuirassiers charge the squares and "break" two of them. Supporting infantry would attack the remaining squares and see them off.


This sums up the Austrian situation on the flank of their army. The cavalry, centre right, is Jacquinot's French light cavalry and has just ridden through three battalions of retiring Austrian infantry. The gun battery in the foreground would be the next victim!

The next battle, Eckmuhl, would play differently. The setup is very similar, a smaller French force and a large hammer blow on a flank. The big difference this time was that the players were now expecting this type of occurrence. In fact, the first days play was nearly all manoeuvre where the Austrians were taking their head out of a noose and trying to realign their army. Being able to play these games over days does enable this type of historic situation to happen and be allowed to develop. Some piccies from this game.


This was the start of the French flank attack. Infantry moving to assault a village behind the left flank of the Austrians. The Austrians had the foresight to garrison this village, Eckmuhl as it happens, and all the cavalry in shot is Austrian cavalry that had advance but is now trying to issue new orders and redeploy to remove itself from being trapped by this flank attack.


I'm struggling to remember this picky, but it is from the other end of the battlefield where more Austrians arrive from Ratisbon, reinforcing the stronger flank of the main army.


This picky is all Austrian. The Austrian infantry in the centre is redeploying in knowledge of the French flank attack arriving. Austrian cavalry is attempting to get to the front, through the traffic jam, to screen this manoeuvre.


Three French divisions can be seen advancing on mass to engage. The "tail" of French is a division redeploying from the centre of the French line, to its extreme flank. A very dangerous manoeuvre in the face of the enemy, but the Austrian redeployment allowed this to happen without incident.


More French divisions move up to the attack.


This is the main lines of both armies now engaged. The village was now the left of the Austrian line and is being assaulted by a crack French division. Austrian Grenadiers are in the foreground, supporting the defence of the villager and attempting a general counter-attack.


Total mayhem at eh critical point. The village was the hinge of the Austrian line, now deployed at 90 degree angle from this village. The French would commit two divisions to this assault and the Austrian two in defence. The outcome would be uncertain for a good number of turns.


The French eventually carry the day and open up the Austrian main line which begins to unravel.
A great weeks wargaming, enough time for all the rules to be used and also to allow the battles to develop from the game starts with fewer troops in position and many more arriving.


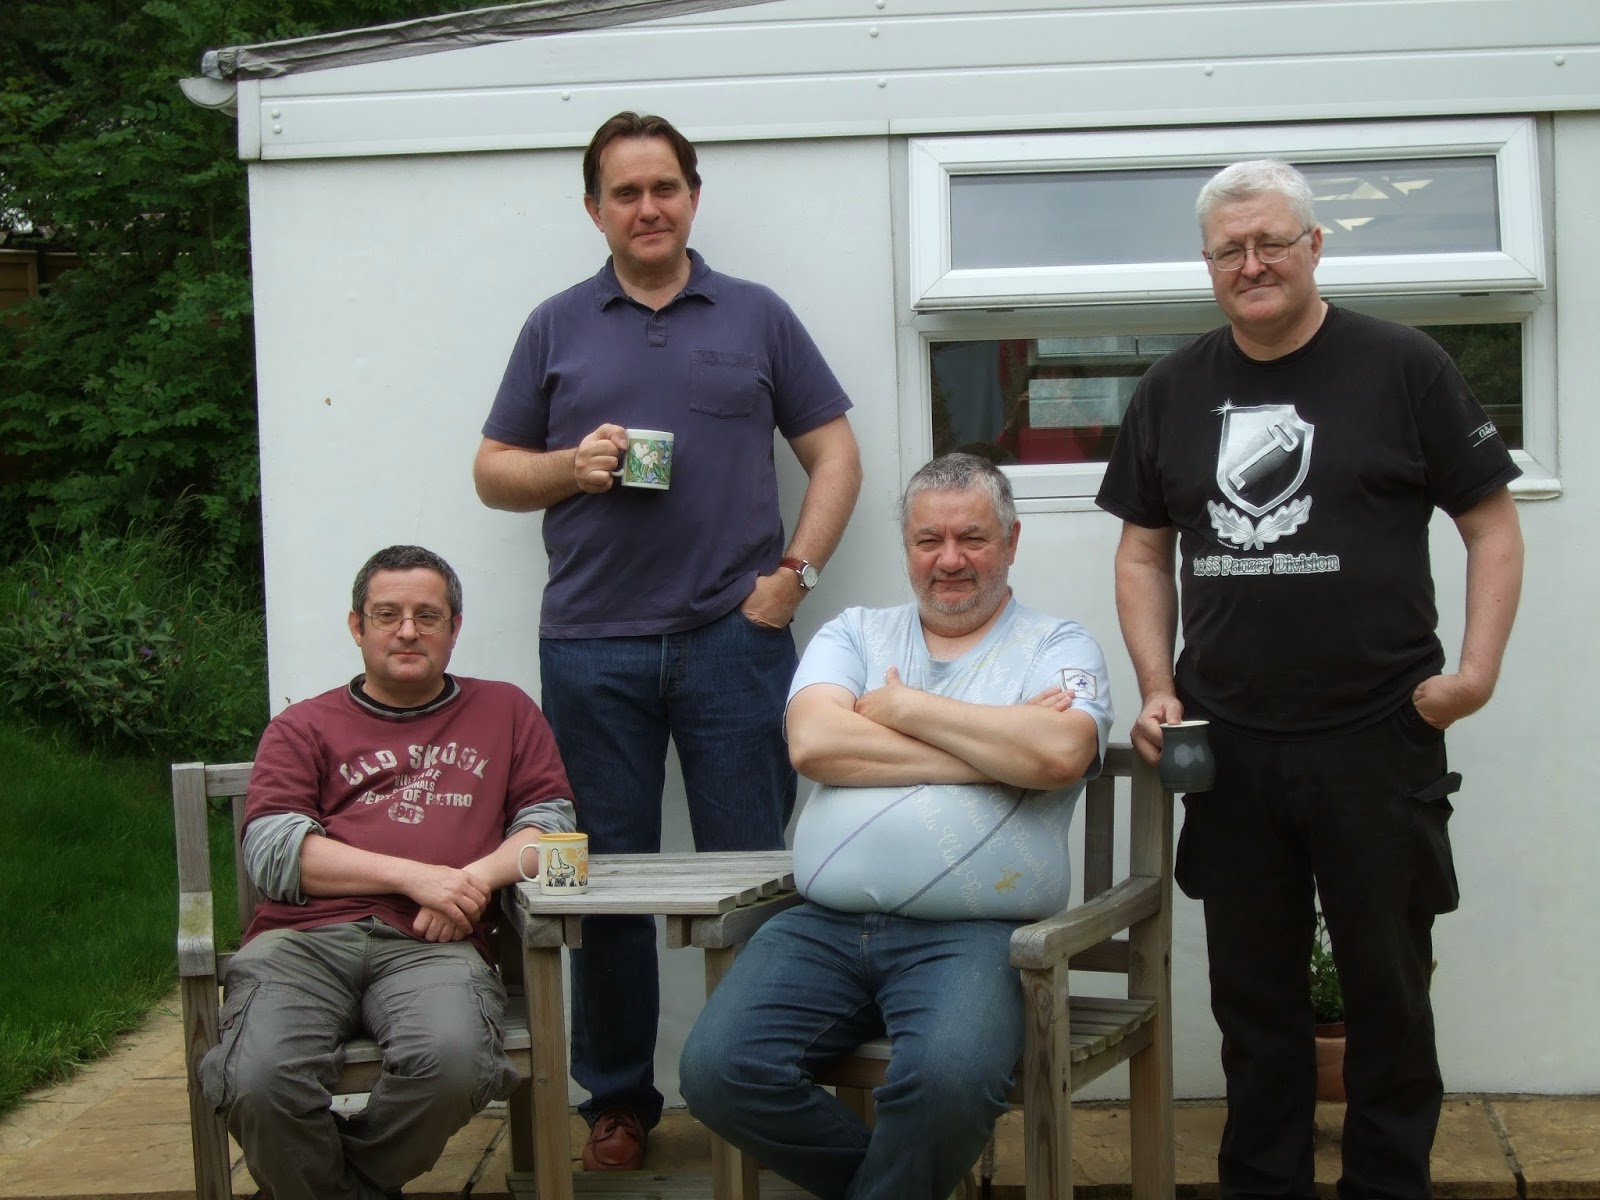
Regular faces of the Generals attending both games. I forgot to take a picky of two other guys who played in the first game, but I'm sure they won't mind.

Other news. The rules should be available to purchase from Caliver at the end of this week. They look very smart and have lots of piccies from the Situation room included.
There will be more publications, the first of which I am working on. There will be a companion set of books covering specific battles. They will include all the OBs, maps and indications of deployments and some piccies of actual gameplay from the games. The first one will be the 1809 Danube Campaign. In addition, each of these books will cover a specific aspect of the rules, in greater depth, a feature if you like.

That's all for now. I've another write ready, probably next week.

Friday, 23 May 2014

Game : 23 Prokorovka


This was a WWII interlude to show off the newly painted German SS and Russian motorised forces. It was loosely based on a Porkorovka type engagement battle. The Germans had a fixed force based on a single SS PzGr Division and the Russians had a list with formations given a points cost and the Russians so many points to "buy" the forces. The Russian force would end up being based on two Guards Tank Corps.
The game started with a recce phase using a fairly simple mechanism. Recce troops were assigned to one of three roads. The progress made by each side was directly proportional to the weight of Recce assets assigned to a given road. The forces for both sides then started from the battlefield edge, the rods being the entry pints and the Recce having to decide whether to fight and hold the ground or retire. This part worked very well.
 
What didn't work very well was my opponent, he shall remain nameless, Steve, got blattered one night and only achieved in not vomiting the next day. So I had no opponent at the critical point of the game. Also, rule reading is to be recommended to all, another hint at why we were so slow. Needless to say, the battle will have to be refought some other time.
 
So, this report is really a series of piccies only. The time line is in order and the main thing to notice is that the troop density has been dropped to give both sides the opportunity and incentive to manoeuvre.


This was on the German right and is a column moving up the road onto the battlefield. Trucks can do 30" on road, 6" off road, so road networks are important


The centre where the village of Prokorovka sat. It was near Russian lines, but the Germans did well on the recce and so started just short of the village. The idea was for the Recce to "play" with the Russians, who were coming on in force, so that the column on the previous picture could try to reach as near as possible the village, before having to tactically deploy.


Far right of the battlefield where you can see the Russian column getting forward as fast as possible. The village is centre right with the cornfields just to its left.


Close up showing how I do transport. A number of bases fit to the transport base. All order rules must be used and if a truck is lost, it becomes a significant transport loss.


The Russians quickly assaulted the village with superior force, forcing the German Recce to retire. However, this would lead to problems where German Recce would eventually be roaming the Russian rear lines with relative impunity.


A German Gepanzert company. The troops in the woods are the dismounts from the half tracks. The half tracks now are used as fire support platoons. If the half track is mounted, the fire power is greater . A simple system, works well, and reflects the tactical use of half tracks.


A picture of the right flank just before my opponent killed himself!! The German armour is a mixture of Pz IIIMs and Marders. The Russians are T34s, 43 version. The T34 is a match to the PzIII if it attacks but the Marder is the killer.


The village as the game progressed. The Russians have a tight grip but the Germans are preparing to counter-attack. The game would end before this could be launched.


I included this to show the Russian air power. There was a full air game bolted onto the ground game with both sides potentially getting significant air support.


This is from the left flank. The Russians tried to stand up and fire fight German Pz IVGs and Stug IIIGs at long range and were coming second very quickly. The only vehicle that really scares the Germans when they are static, is the SU 152. The Russians would slowly give ground.

We forgot to do the photo gallery of the players, but Steve at least may want to forget it, eh Steve? At least it wasn't booze at our place that did him in!!

The next set of games are Napoleonic, Abensberg & Eckmuhl as separate battles. The whole set up process with tiles will also be used, so more new stuff to see.
Hopefully not long to wait for that posting.........................!

Thursday, 24 April 2014

Game 22 : Markgrafneusiedl

This is a small report on the Wagram continuation theme. This part of the battle is the fight on the extreme left of the Austrian Line with 2 Corps and the Avant Garde, against Davout on the extreme French right with Oudinot to his left. The Austrian right hand end of the battlefield was Baumersdorf and the left of the Austrian line was Markgrafneusiedl.
This picky is looking at the French right in the foreground. I'll mention now that the player, on the right in the middle, is Alan Tuckey. He nipped off home before the usual rogues gallery picky was taken. Alan has been integral to this project and has painted all of the French cavalry and some of the French infantry. You can see me advancing with Austrian light troops against Davout


This shows the Austrian right at Baumersdorf being attacked by Oudinot. The French would eventually seize the parts of Baumersdorf on their side of the river, but nightfall would see no time left to launch an attack over the river.


The thing of note here is the Austrian cavalry at he bottom and right of the picky. You can see from the left, an Uhlan regiment, 228 figures deployed as 2 Btns and acting independently of each other. Austrian Uhlans and Hussars are 8 squadron regiments. They can be used in one of 2 ways. Use as is, the full regiment or split into 2 Btns of the regiment. This choice is made at the beginning of the battle and lasts for the game. In addition, the Btn with the Liebfahne has its morale reduced by 1 factor and the Btn with the Ordinafahne has its morale reduced by 2 factors.
The Hussars are deployed as a complete regiment of 228 figures.
Using the above, the Hussars maintain their base morale of Elite. The Uhlans have a base morale of Veteran, so their Btns drop to a morale of Seasoned and 1st Line accordingly.


Another picky of the action at Baumersdorf. French skirmishers are slowly whittling down the formed Austrian troops to their front.


Closer up shot of Meerveldt's Uhlans (I think its them!).


French troops are now manoeuvring around Baumersdorf to begin the river assault. Time would run out before this gathered pace.


This is more of a shot in the centre. Here, Austrian gunnery was, lets say, lucky all game. They threw for more hits than the rest of us put together and never rolled low when trying to inflict losses. Counter battery was deadly when used and to put things in a nutshell, Davout's division in this sector limped away roughly handled. Even when Alan left and Brian, his opponent, played both sides, when Brian fired with Austrian guns, the lethality continued!


So, apart from Alan, the mug shot shows us regulars from the past.


Next up is a WWII interlude, then back to this campaign with the separate battles of Abensberg and Eckmuhl. A final postscript for guys interested in the rules. The rules have gone to the publisher for printing, Caliver. There is also a Yahoo Group for the rules. Try the link here. The rules are called "In the Grandest Manner".  https://groups.yahoo.com/neo/groups/Inthegrandestmanner/info
I'll keep people updated. I've also started on a scenario book for the 1809 campaign. Funnily enough a lot of the work is already complete.
Enjoy.

Wednesday, 5 March 2014

Game 21 : Baumersdorf

This is a short report from a section of the Wagram game. My self and Pete, a regular, fought the action around Baumersdorf. Pete had played as Austrians defending the area and he wanted to try attacking the Austrian line in this sector. The forces consist of Oudinot's Corps on the French side and Two Divisions of the Austrian II Corps under Hohenzollern. The pictures are in no particular order.
The French started by advancing the Divisions of Tharreau and Claparede side by side against the Austrian line. The Austrians started by surprising the French by advancing against their right flank with light troops and a cavalry regiment of Uhlans.
Now for some piccies. Some have nothing to do with the battle we played, but there is a new camera lens that needs to be tried out!


This gives an idea of the size of the Austrian line infantry division. It is a mixture of German and Hungarian line infantry.


A new lens. This is a telephoto lens that has the affect of opening up the picture. The downside, without extra lighting as I discovered, is that shadowing becomes more pronounced.


Another telephoto shot that shows the whole of the French reserve line along to the French left flank at the top of the picky in the distance.


A close up with the standard lens of Austrian Cuirassiers. I think the detail you get in 10mm is quite brilliant. I'm also practising with manual focus, photography knowledge is now becoming a necessity.


This shows part of the actual action. The initial Austrian attack was in the foreground. After a cavalry clash that was indecisive, the Austrian withdrew to their side of the river. Now you can see a French Division advancing. Things are already slightly problematical for the French as this Division is the reserve Division replacing Claparede who got entangled in a fight near the village that was repulsed.


This is Tharreau's initial assault on part of Baumersdorf. The Austrians would hold, but the Divisional Generals for both sides would become casualties. This left Hohezollern and Oudinot having to step down to act as Divisional commanders.


This is the left hand portion of the previous picky. It shows a lot of retreat markers on Tharreau's troops after a successful counter-attack by Austrian infantry. The Austrians would keep advancing and cause the whole of Tharreau's Division to retire in order to regroup. The fact that all of Tharreau's Division, and Claparede's, except one battalion in each of elite light infantry, were second class line troops, did not help.


This is from the other end of the village from the French side and shows LeGrand, the reserve Division, filtering his troops through to the front line.


This is towards the end of the battle. Taken from the Austrian side, the French have taken one part of Baumersdorf. The militia that were deployed there can be seen retreating. The French victory would be short lived. The troops that were successful were part of Tharreau's Division and they would soon be retiring.


This is to the left of the previous picky and shows a general firefight developing. The French light infantry would prove to be a serious problem for the Austrian gunners who would limber and redeploy in order not to suffer excessive casualties.


This is a picky taken at the start of the game on the Austrian left. It shows the Uhlans, a regiment of 192 troopers! Jaegers are deployed to their front, deployed fully in open order.
As an interest, we concluded the game by assessing losses. Tactically the Austrians still held Baumersdorf. Nightfall would come before the French might make progress away from the village in the general firefight, their reserves having quite high morale.
The stats show start numbers, casualties and % losses.
French
Infantry: 3456 : 399 : 11.5%
Cavalry: 144 : 45 : 31.3%
Gunners: 128 : 32 : 25.0%
Guns: 32 : 2 : 6.3%

Austrian
Infantry: 2196 : 287 : 13.1%
Cavalry: 192 : 62 : 32.3%
Gunners: 88 : 21 : 23.9%
Guns: 22 : 0 : 0%

We weren't aware of how very similar the % losses were and its something that I might try to do for the games as a standard report.
That's it for now, I'm now laying out the battlefield from Baumersdorf to the Austrian far left so that I can fight Davout's action around Markgrafneusiedl.